

by Elizabeth Walby
Jesus said to her, “I am the resurrection and the life. Whoever believes in me, though he die, yet shall he live.” John 11:25
Each Easter I look for meaningful ways to teach my children about Jesus’s death and resurrection. So a few Easter’s ago my daughters and I made resurrection gardens. I love crafts that help us to see Jesus in a new and glorious way.
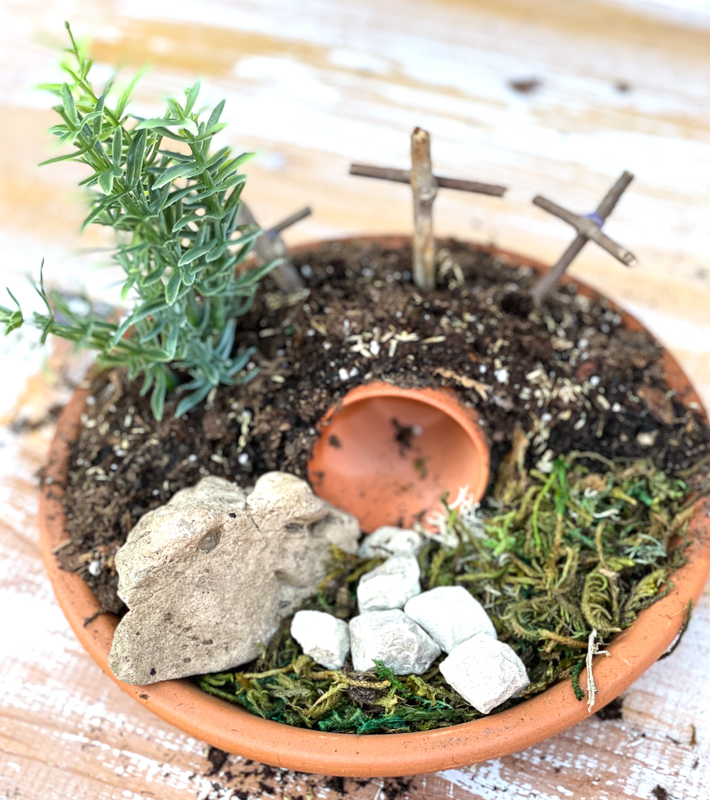
Resurrection gardens are a small replica of the tomb, and they are a simple way to talk about the death and resurrection of Jesus that we celebrate at Easter. The garden displays an empty tomb and has the three little crosses above the tomb.
So if you are looking for a simple craft that is natural and meaningful I will show you how we made our little resurrection gardens. It is a fun time to spend together and maybe enjoy a little bit of sunshine. I highly recommend making these outside if possible. They can be a little messy!
Here’s the supplies you need to make a resurrection garden:
- Flat round tray
- Mini terra cotta planter
- Potting soil
- Twigs & Twine (to make the crosses)
- Pebbles, moss, etc
- Grass Seed
- Strip of white fabric
- Stone
Here’s how you make a resurrection garden:
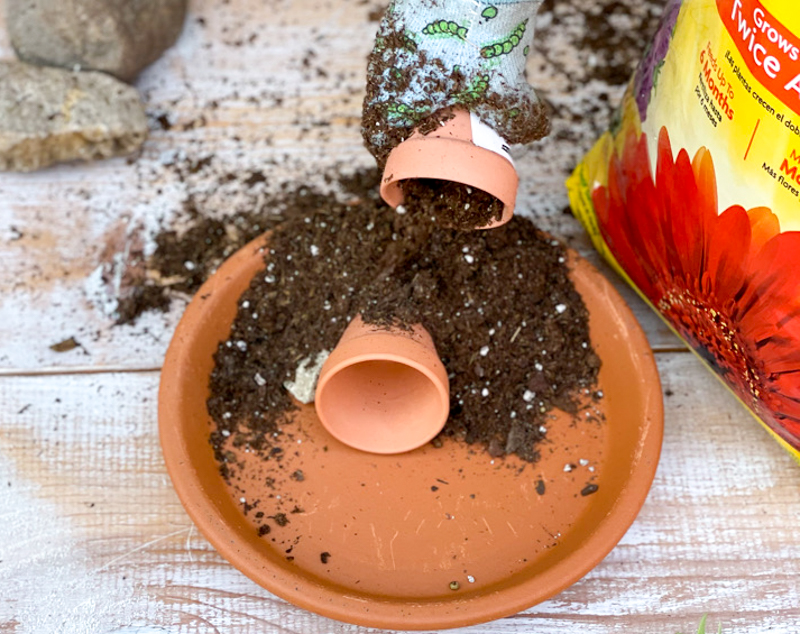
Step 1: Place your tomb on the tray
Next take your mini terra cotta planter and place it on your tray laying sideways. Cover the top and the sides of the planter with potting soil. Make sure to leave the opening of the planter uncovered.
Step 2: Make your three crosses
The first step is to make your three little crosses. Use twine and the twigs to make three crosses. I make the middle cross slightly bigger than the other two to represent Jesus’s cross.
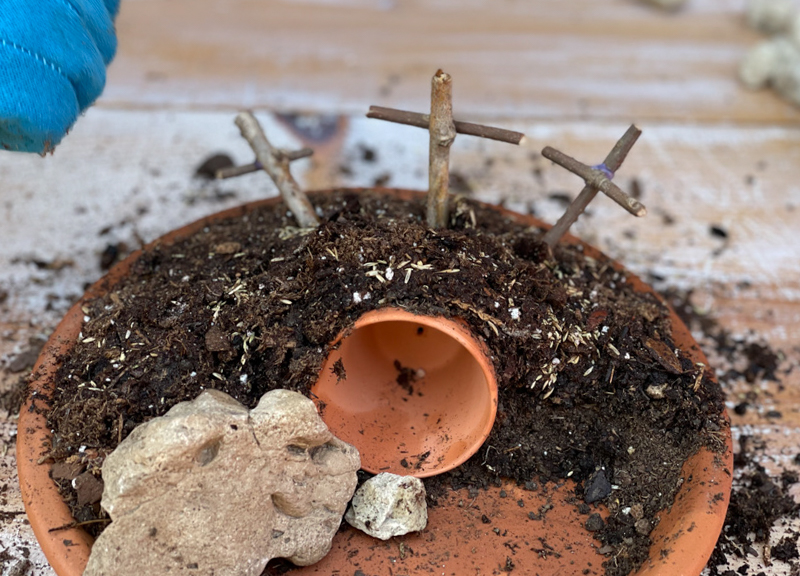
Step 3: Fill in the other areas with faux plants
Use pebbles, stones, faux floral greens, moss or other items to fill in the remainder of your garden. Make sure to leave the potting soil uncovered for the final step.
Step 4: Cover your potting soil with grass seed
The final step is to plant your grass seed. Sprinkle the grass seed on top of the potting soil. Then cover the grass seed with water. Use a little potting soil to cover the grass seed.
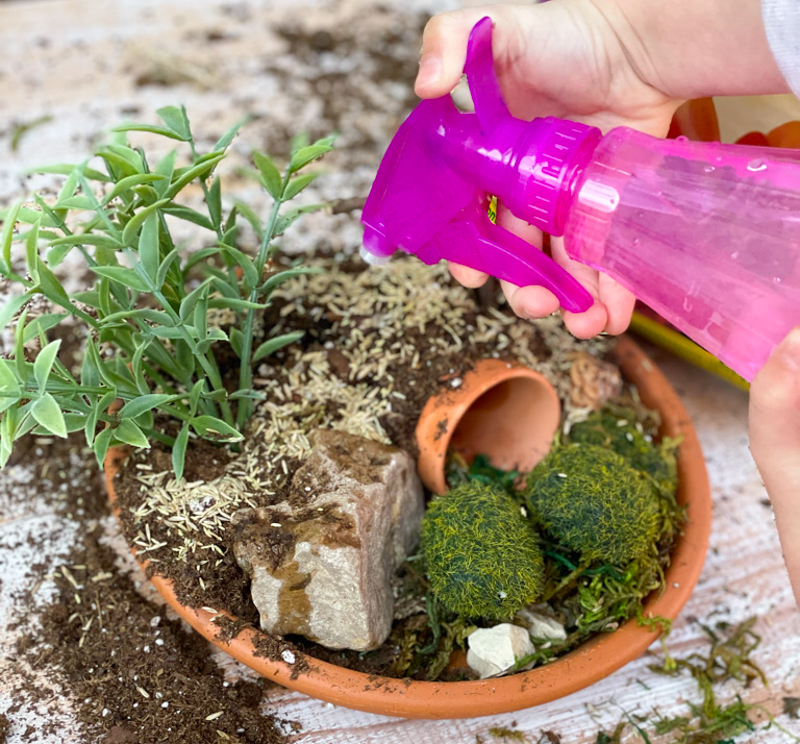
You will want to continue to water your little gardens every day and any time you notice the soil looks dry. If you do, the grass should spring up in just a few days. And you can just watch your garden grow!
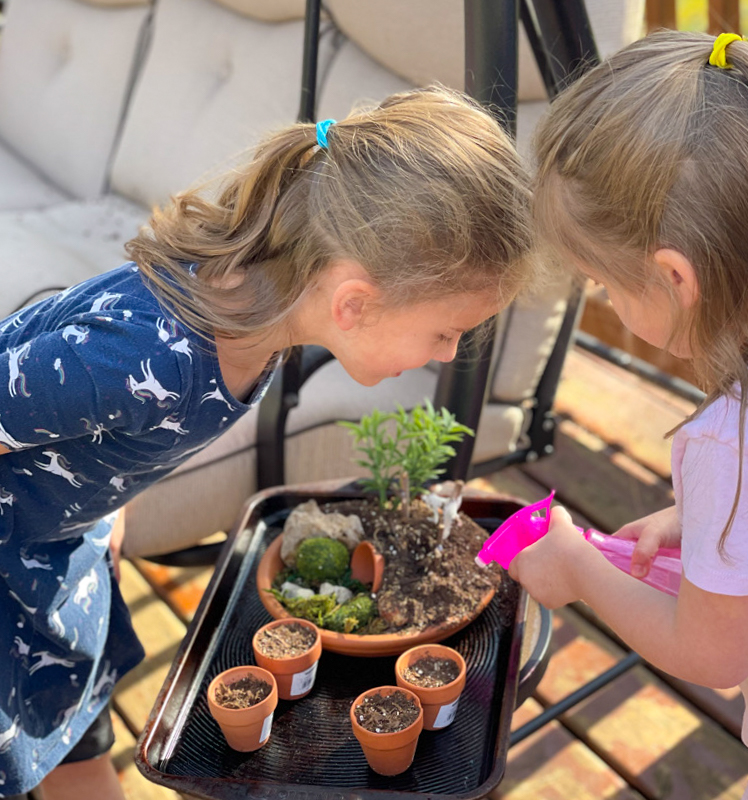
Here’s Annabelle and Emmie watering their garden and other plants.
And that’s it for making your own resurrection garden. I hope you enjoyed making these cute little resurrection gardens and more importantly that you had the chance to share the wonderful news of Jesus’s death and resurrection with each other!

‘He is not here, for he has risen, as he said. Come, see the place where he lay.” Matthew 28:6

Elizabeth Walby
Elizabeth is wife to Damon, and mom to three lovely daughters- Annabelle, Emmie and Lilia. Damon and Elizabeth moved to Rochester from Minneapolis in 2018. At that time Elizabeth started craft blogging at A Well Purposed Woman as a stay at home mom. She believes creativity is a God- given gift that can glorify Christ, bring joy into everyday life and BLESS others!
3 thoughts on “Easter craft: how to make a resurrection garden ”
This is so sweet. I love projects that teach us something and children can help with this and learn about the Resurrection.
This is so sweet. I love projects that teach us something and children can help with this and learn about the Resurrection.
I love these gardens! What a fun craft, and memorable and meaningful activity during Easter.